iReplica: Support Page

If you've ever wanted to capture a photo that closely resembles what your eyes see, then iReplica is just the app for you. iReplica provides users with the ability to both capture and save photos in RAW, while also providing two different processing pipelines to adjust the image. We are regularly improving on the application's mechanics so stay tuned for new updates.

The camera application is inspired by work from the laboratory of Dr. Alonso. The app is written by Adam Khoukhi, who is supervised by Hamed Nasrabadi, both are in the laboratory of Dr. Alonso.

The purpose behind developing this application is to provide vision research in order to better understand how the human eye works. So you will be able to closely replicate what your eyes see on your phone and contribute to world-class vision research!

iReplica is currently available only the App Store (iOS).

* Supported on iOS 15.0 and above for iOS (iPad and iPhone)
* iPhone and iPad must have atleast a 12MP back camera to support RAW. (iPhone 6s and above)
* For contributing, make sure the Mail App is installed and linked to an account.
Scroll down for the Capturing Stage

Capture Photos


The Capture Photos stage is, simply, where you will capture the photo. iReplica captures photos in RAW.

What is RAW? A RAW file is simply a digital negative image file that is minimally processed and is usually uncompressed. When capturing with RAW, the user captures all image data recorded by the sensor. So why capture in RAW? There isn’t really a downside to capturing in RAW, except a larger file size. When capturing in RAW, you get the highest level of quality, easily adjust exposure, brightness, and white balance, and you get much better detail.

Under the viewfinder display is the capture adjustment segment selector. By simply clicking, or swiping to the selected segment, the user can adjust the exposure steps to be used when capturing the photos. Select the correct segment depending on whether you are indoors or outdoors. This selection will help us better understand the ambient light in your environment, which will prompt you with a slider to adjust the photo’s exposure. The application uses HDR (High Dynamic Range) and captures 4 of the same image with different exposures, 3 of which will be relative to the captured photo with the selected shutter speed.

If you have any suggestions on other features we should include, please let us know by contacting us through the email at the end of the page!
Scroll for down for the "Under the Hood" & Standard Processing

"Under the Hood" & Standard Processing


Once you capture a photo, the application starts processing the RAW sensor data. If you would like the RAW data yourself, no worries, you can save the RAW photo alone or with the processed image. While the screen has a loading page, the application first reads the unprocessed sensor data. It then applies black level so the image doesn’t look saturated, and applies white balance so that white looks white and not green or yellow. Once the color is correct, the application demosaics the Bayer pattern and applies the appropriate color space conversion. Lastly, HDR is implemented in order to get the best the best detail possible in the photo's light and dark areas.

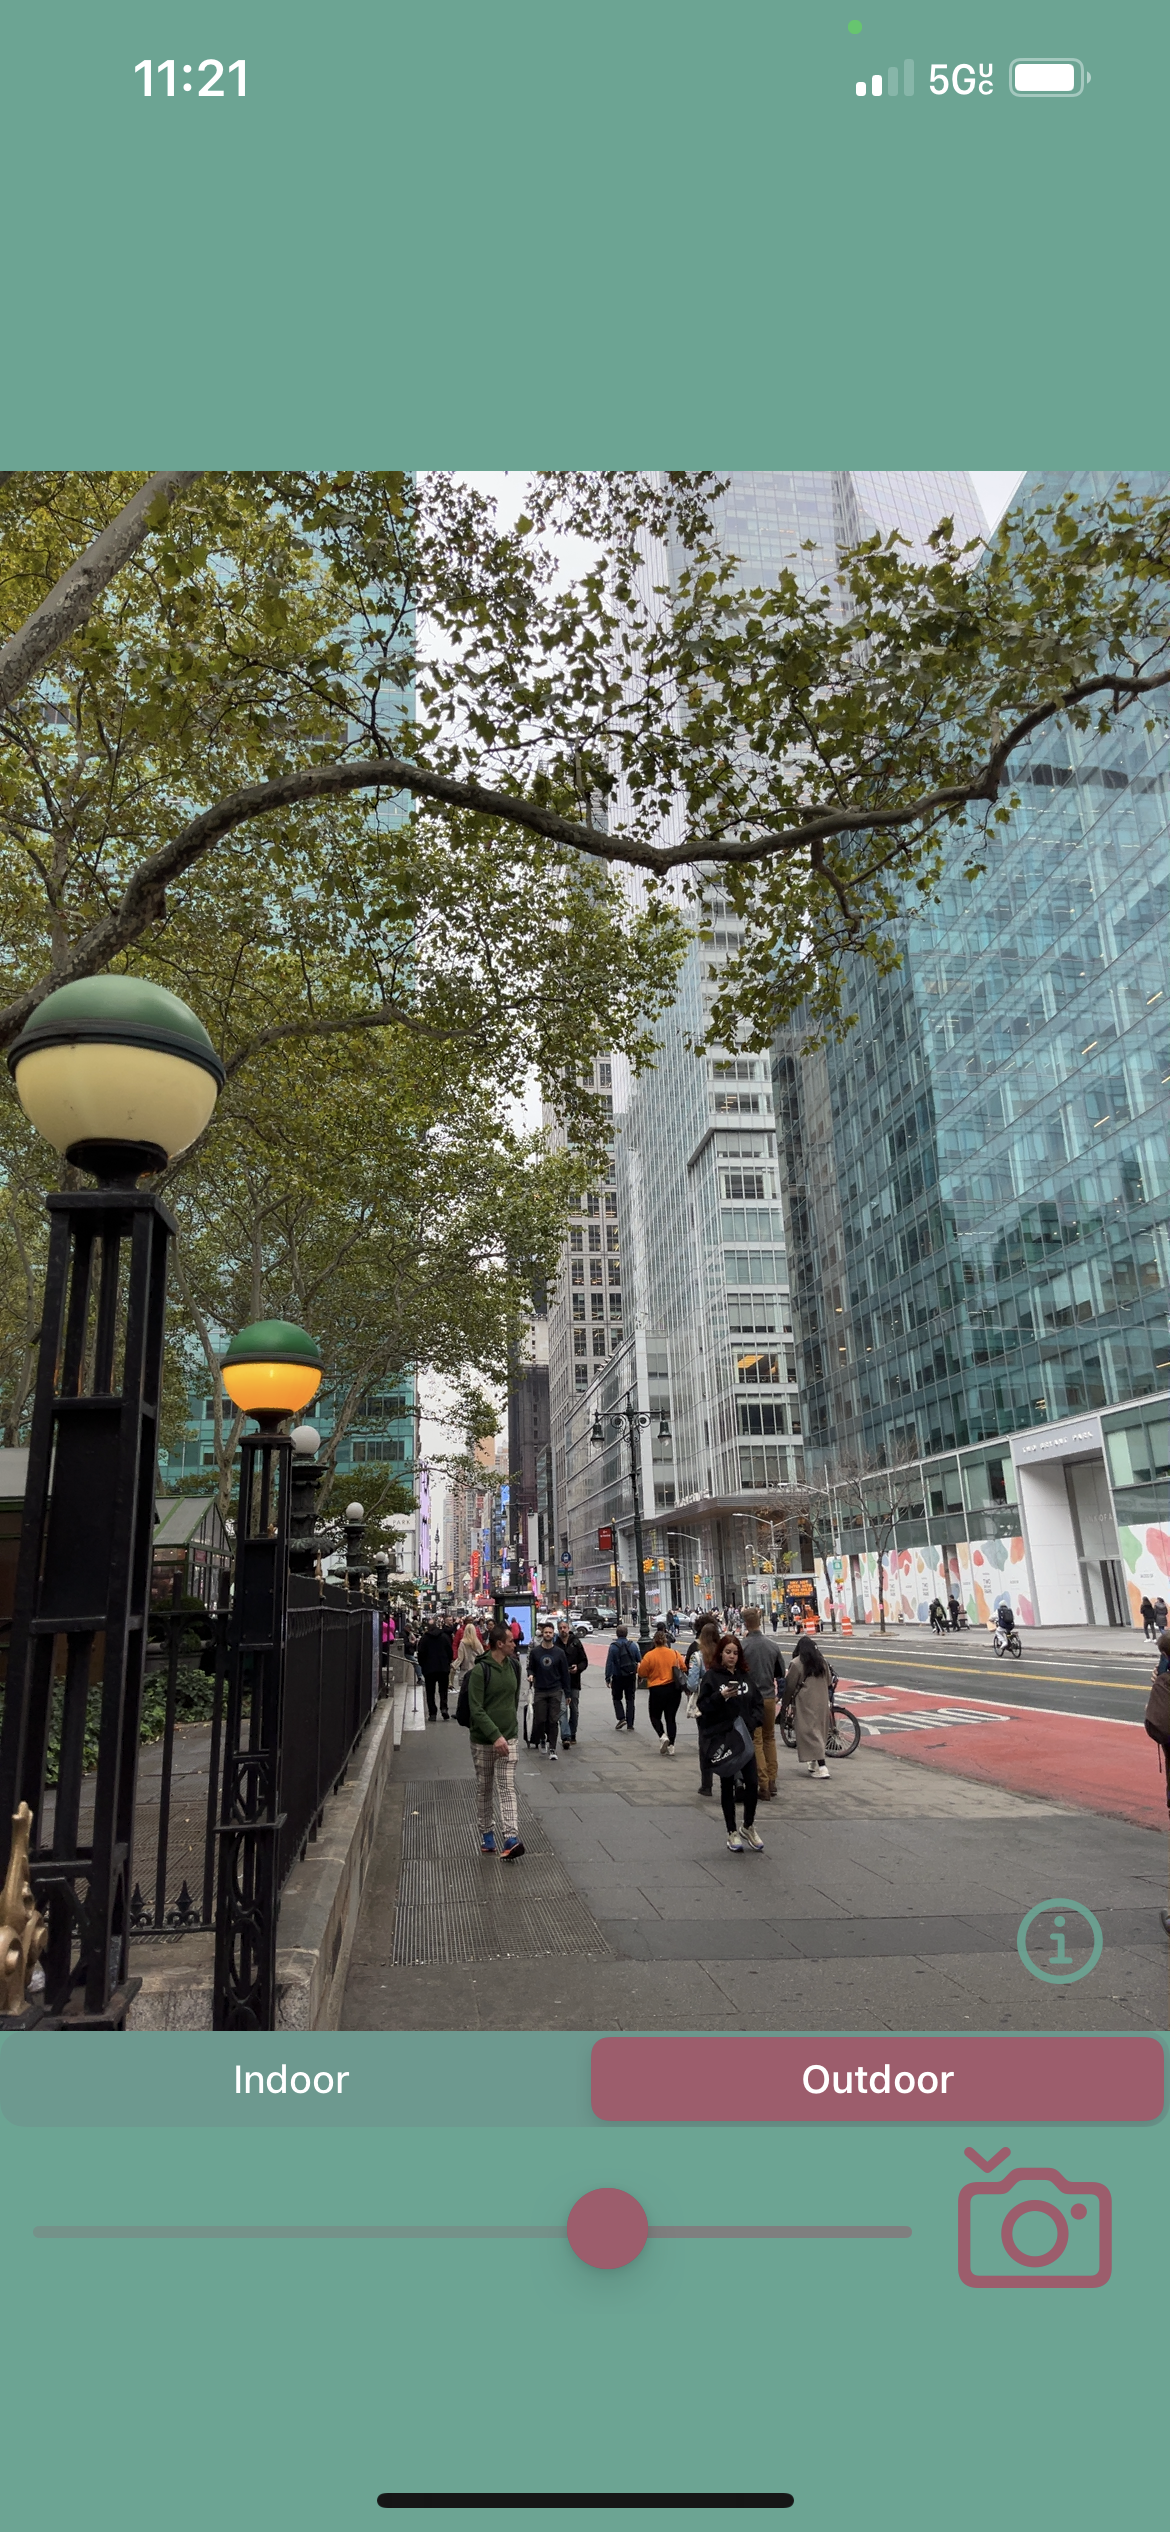
Once the processing is complete, a view will appear similar to the one you see here. This means the processing is done, and you now have the choice to further process the captured image in 2 methods as displayed in the top part of the image. You may switch the processing method by simply clicking or swiping to the desired method in the segment selector. You can always switch back to a different method, your progress will be saved (two copies of the image, one for each method). 
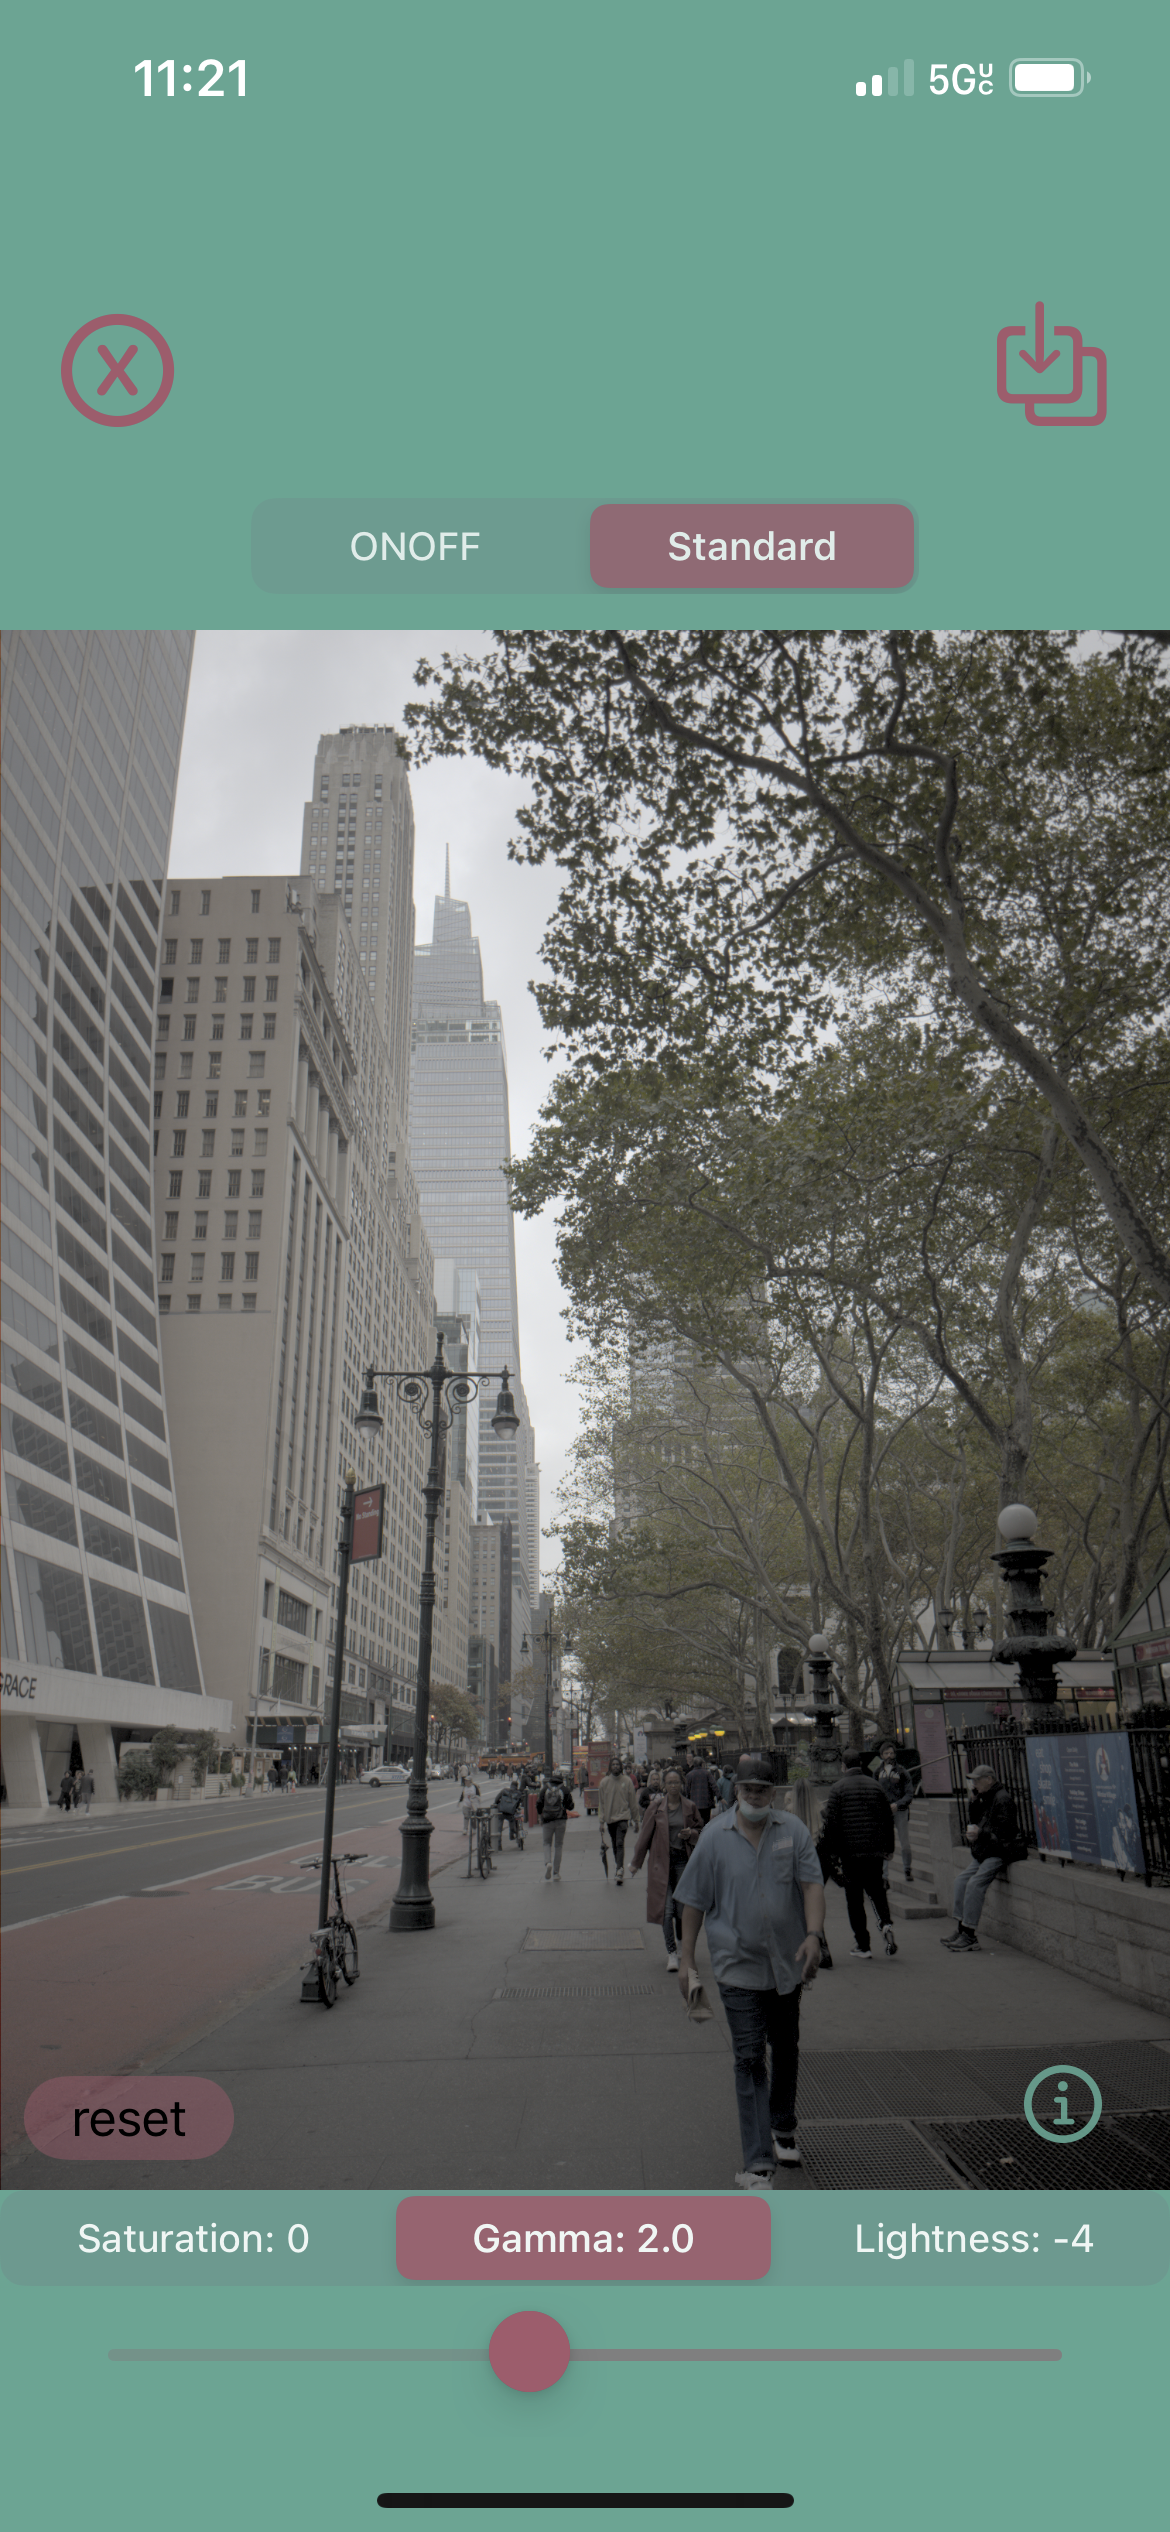
You can also click on the reset button in the bottom left of the image if you would like to remove all editing done on the selected method.

Currently selected is the standard method. This method applies what is commonly applied, a gamma correction. In this method, you will be able to process the image by adjusting its gamma correction, saturation, and lightness. The saturation and lightness are from the HSL model. Saturation is a percentage value that describes the intensity of the color. Gamma, also known as Gamma correction, is a nonlinear operation on the luminance: (1.8-2.2 is the ideal range). Lastly, lightness is a percentage value that describes how much light you want to give the color.


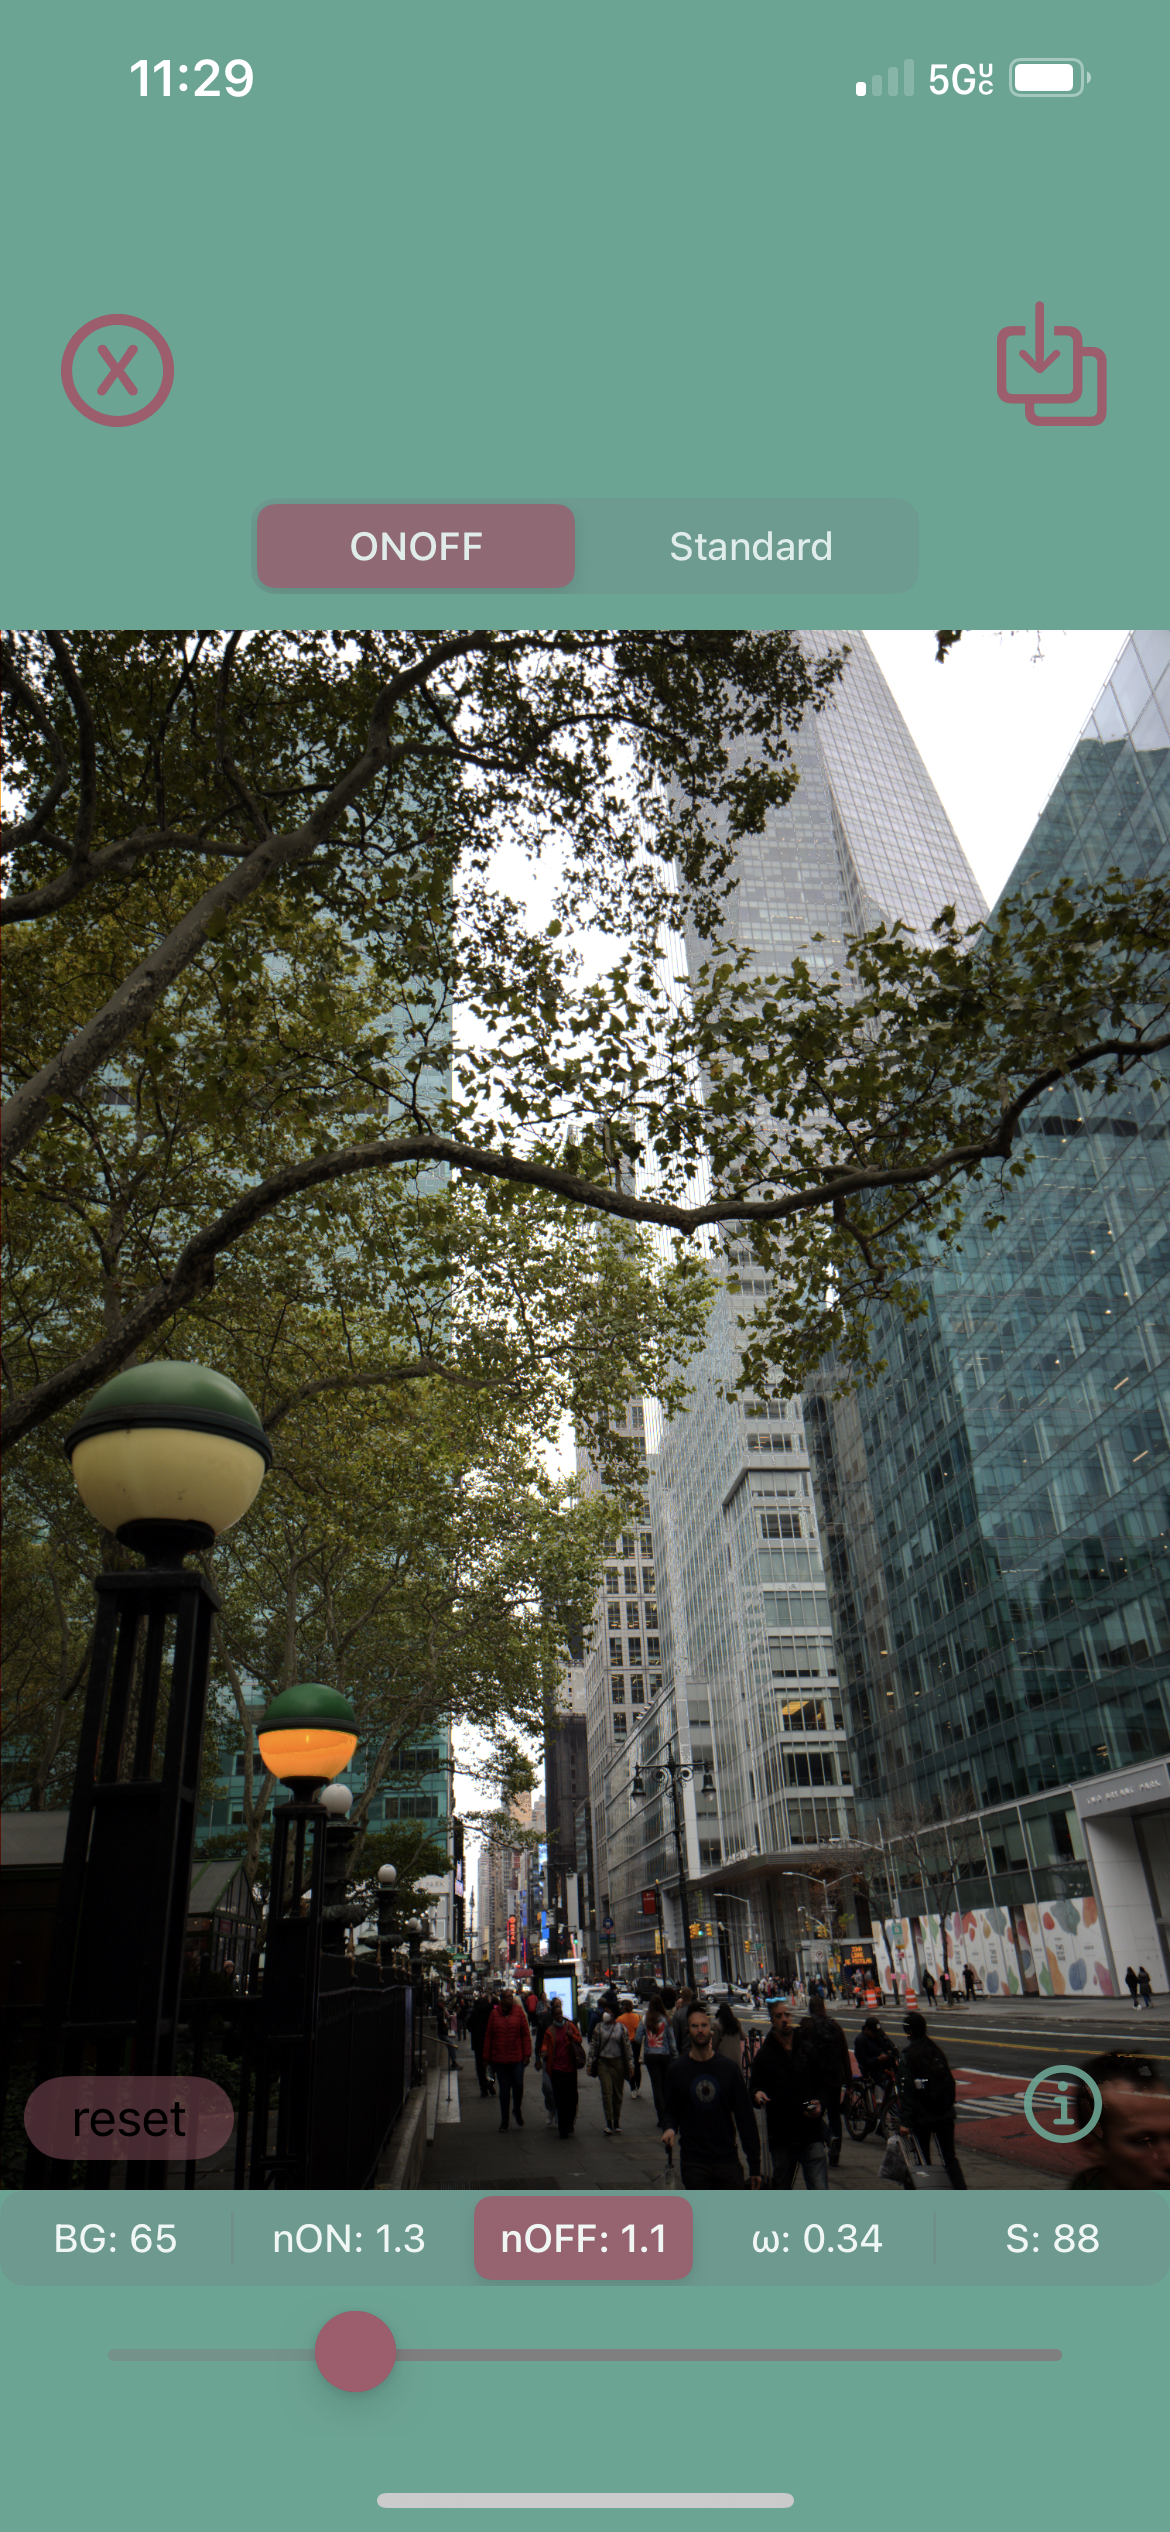
Scroll down for the ONOFF Processing & Saving/Sending

ONOFF Processing, Saving, & Contributions


The other method, ONOFF, is our custom method that is based on how our eyes biologically process what we see. The best-resulting values vary heavily based on the image so a little more tweaking is necessary for this method. BG is the percentile value describing the ON and OFF backgrounds. The percentile is based on the image's maximum luminance. Next, nON maps the ON luminance values with a non-linear gamma function to the power of 1 over the value selected. On the other hand, nOFF maps the OFF luminance values with a non-linear gamma function to the power of the value selected. ω specifies the relative ON and OFF response strength. Lastly, S maps the upper S percentile of the ON luminance values with a non-linear gamma function to power between nON & nOFF. For further information on that, please refer to the article Click here.

Once you're done editing, you can now save the photo to your Photos by clicking the save button on the top right corner. There, you will have 3 saving choices; save only the captured RAW photo in RAW; this will save a DNG file, about 12 MB in size, in your Photos. The preview that you see for the RAW is simply a jpg preview. Click on the Processed if you would like to only save your processing of the captured photo. This will save a png file that looks identical to the image displayed on your screen. If you would like to save both, then click on RAW+Processed.

After your photos are saved, you will be prompted with a success alert and asked if you would like to contribute to our research (The contribution does NOT involve the content of your photo, nor any information relating to your identity. More information on that in our Privacy Policy). The contribution is done by sending us an email that has a CSV datasheet of your adjustments and a few device-specific information. It only takes a few seconds. Thank you for choosing our app and contributing to our research!


Still have questions? Contact Us at josemalonso10@hotmail.com